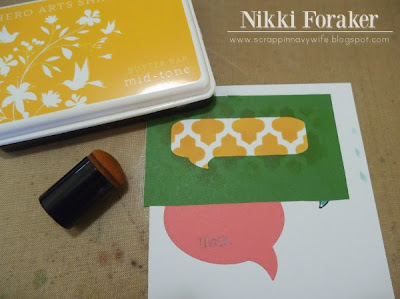
Hello, and happy Friday! Here is my homework for the last day of Summer Card Camp 2. Sniffle, it has been fun! I snapped some pictures while I was making this card today, I figured that would be easier than trying to explain it with words. :)
I cut masks from Post-It craft paper with the Stitched Round Speech Bubbles and the Stitched Square Speech Bubbles from MyCreativeTime. I used both the negative and positive cuts.
Positioned my Heidi Swapp mask...
Sponge on Tide Pool ink and outline the bubble with a black marker...
Remove the positive mask and replace it with the negative mask. Most of the blue chevron bubble is covered, but you can see the little "tail" sticking out...
Ink up the long bubble with Butter Bar ink over another Heidi Swapp mask, and outline that with a black marker too...
For this last bubble, I turned that same chevron mask the other way and inked with Pale Tomato shadow ink. :)
I stamped the greetings from the Things I Love set from MyCreativeTime. I ♥ ♥ ♥ Shut the front door! ;)
To finish, I added the dude from the Stitched Restroom Peeps dies from MyCreativeTime...and some fabulous Crystal Clear sequins from Neat And Tangled.
I hope you have a FABULOUS weekend!
♥ Nikki ♥


awesome!!!!!
ReplyDeleteHmmm...This card kinda matches the new Chevron Scentsy warmer! LOL! AWESOME!
ReplyDeletelove this card, thanks for the photo based explanation too! :)
ReplyDeleteThis is so clever. You are always showing us things that are fabulous! I will miss this . . .
ReplyDeleteYour cards are well-explained, especially with the photos. Good job! Love the stencils!
ReplyDeleteSuper job on your card and explaining how it all is done. The pictures are great. Thank You!
ReplyDeletequilt 4 fun 2 at hot mail dot com
Wow. Love how you made your own PP. Those stamps are hilarious. Must have!
ReplyDeleteWOW!!!!!!!!!!!!!! I AGREE!!!!!!!! SNIFFLE!!!!!!!:( BUT, your cards made it SOOOO WORTH WHILE!!!!!!!:) SUPER JOB & FUN to read post!:)
ReplyDeleteSo cute! Love all the masking, ink choices and sentiments!
ReplyDeleteFab...love the masking and inking!!
ReplyDeleteWell done. The result looks like a clean and simple card but a lot of masking work was done to achieve this!
ReplyDeleteWhat fun! Great card!
ReplyDeleteAwesome!!!
ReplyDeleteHey Nikki another splendific card. Girl you sure know how to use dem dere inks I so do luv it. Great idea showin' yur stuff by pics.
ReplyDeleteI am so wanting to do this and I am extremely happy that I bought this stamp stamp set from Emma as this idea will work nifty on my LO so as always thanks for sharing your ever so bright ideas.
You make my days girl you really do.
Miss Nikki, I LOVE LOVE LOVE this card!!! It is SOOO MUCH FUN & I sure enjoyed EVERYTHING you have made from your class! I have yet to comment on all of them, but I sure did LOVE ALLLL of your AMAZING cards!!!! BIG HUGE HUGS!! ;) LUV YA!
ReplyDeleteNikki ~ SHUT THE FRONT DOOR! Sorry I couldn't resist saying that! But honestly that is such a COOL tutorial! Of course I LOVE the card too! WOW! I am going to have to give this a try too! As always BRILLIANT!!
ReplyDeletethanks for the tutorial. I have that chevron mask and wasn't sure what to do with it!!
ReplyDelete